Graceland e-mail is handled by and stored on a central server that services our e-mail. The term server can refer to the service (software) or to the computer (hardware) that runs it. The context in which the term is used helps us distinguish, but the distinction is unimportant in most conversations. Graceland's e-mail server is a Microsoft Outlook server (server-side software) and most employees use Outlook client (client-side software) that is running on their computer. Note: Outlook [client] is not the same as Outlook Express (another client program). The Outlook client is not used by students and it does not work for employees who take their computers off campus. Fortunately Outlook server has multiple ways it can be reached. Think of it as a multi-lingual server with different operators standing by on different channels for us to access the same information using the language of choice. The three ways to connect with the Outlook server are:
The following instructions show you how to configure a particular version of Outlook Express, unlike the one you have today. The details should be similar. This example also illustrates how to set the client to access more than one e-mail account from different servers.
Steps 1 and 2 occur if this is not your first time to run Outlook Express, that is you already use it for other e-mail accounts and want to add your Graceland account to the mix. If not, then you will quickly find yourself at step 3.
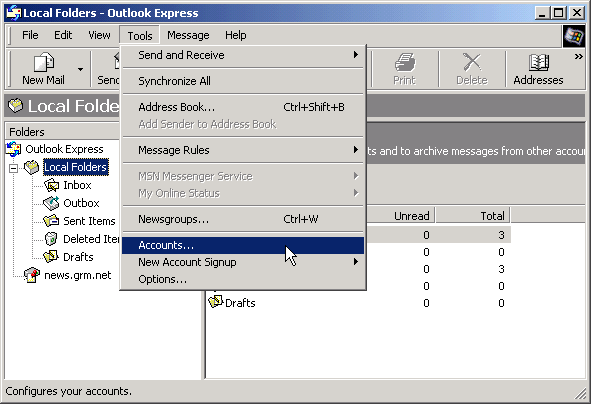
From the Outlook Express Tools menu, select Accounts.
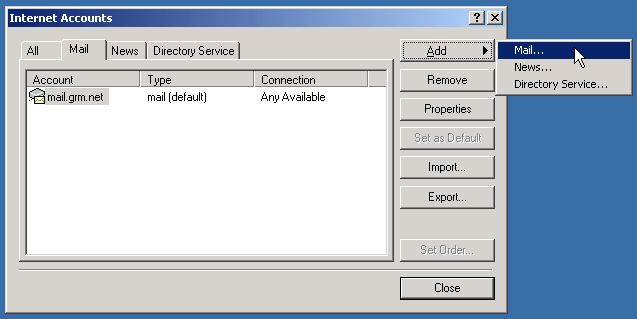
Click on the Add button to add a new mail account.
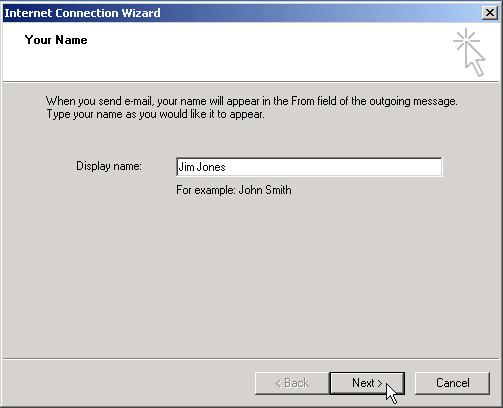
Answer questions from the Wizard, starting
with your full name. Use your real name here,
otherwise responses to your questions or credit for homework
that you e-mail to faculty may not happen.
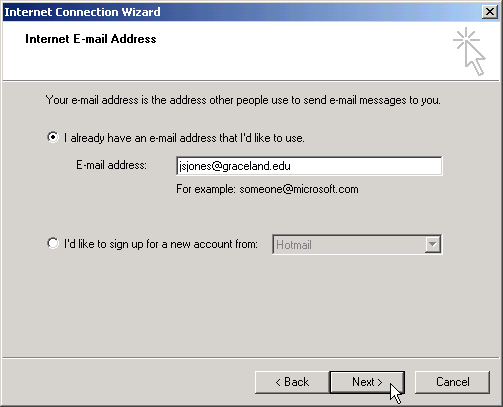
Enter your complete Graceland e-mail address.
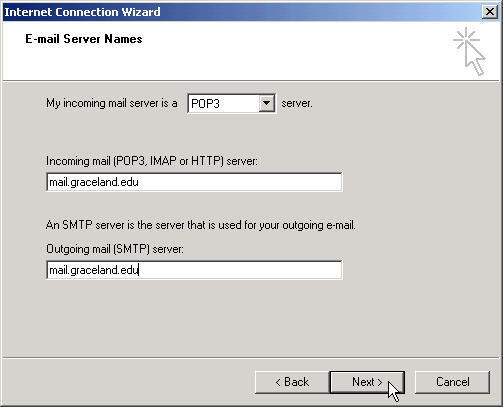
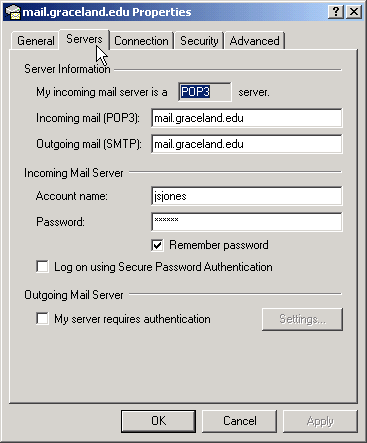
Enter mail.graceland.edu as your incoming (POP3) and outgoing server.
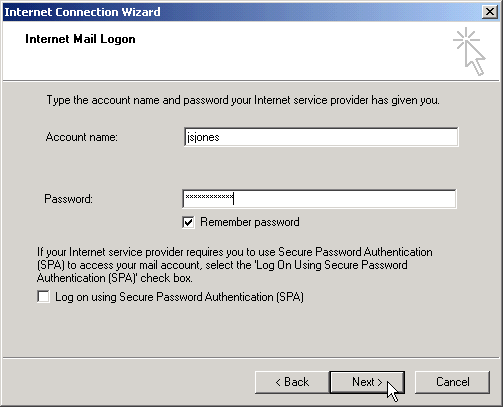
Enter your account name (i.e., your Graceland account username).
If your PC is not secure from others using it, then you
probably should not enter a password and have it be remembered.
In that case, you will be asked for your password each time you
start Outlook Express.
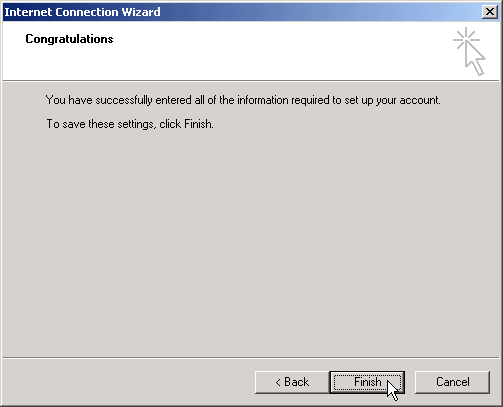
Click on the Finish button if all is well.
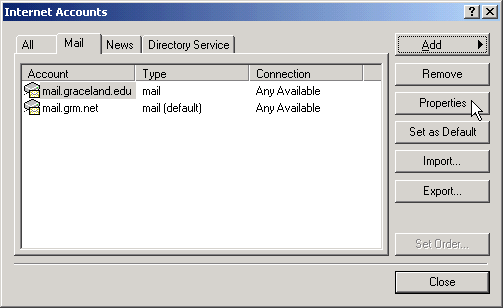
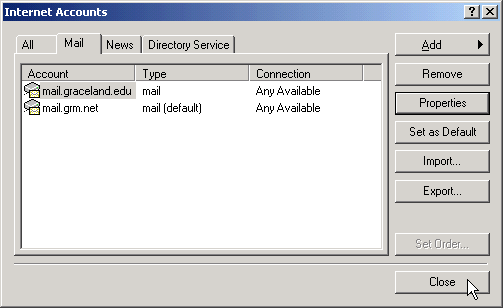
You should be at the Accounts dialog box (from step 1) and see the added
Graceland account. If it is not highlighted, select it and
click on the Properties button to review the
configuration settings for this account.
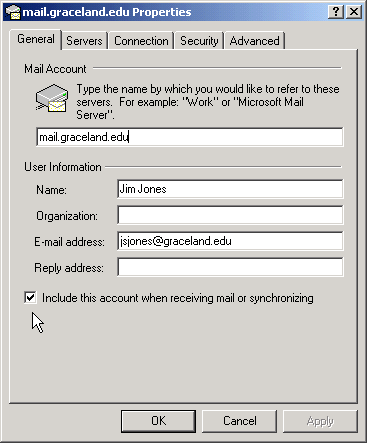
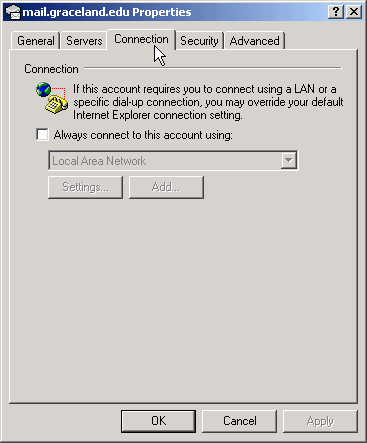
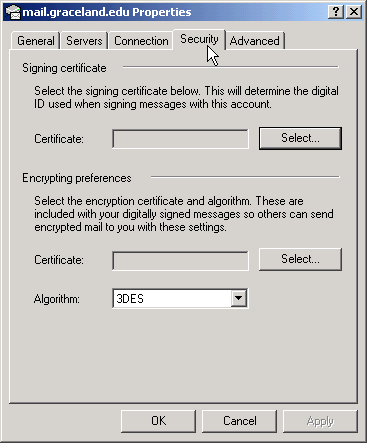
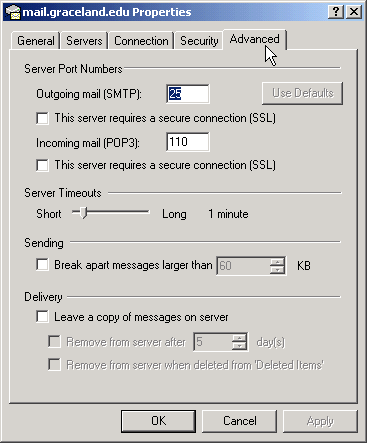
Under each tab (General, Servers, Connection, Security, Advanced)
you have an opportunity to change configuration settings. If you
do, press the Apply button to save them. When finished
press the OK button. You probably do not need to do anything
if the data was entered into the Wizard correctly. Your settings
will look similar to those below. Make sure that the checkbox
to Include this account is checked under the General tab.
|
|
|
|
|
Notice that under the Advanced tab, the Leave a copy of messages on server is not checked. This is common. Many users are happy to have their e-mail deleted from the server once it is transferred to their local computer. It is also common for a user to check their e-mail from several different computers (perhaps one in your dorm room and another back home), in which case one often checks this checkbox on all but one's own computer. That way you can check mail from several computers but it will remain on the Graceland server until you check up on your e-mail from your own primary computer, thus giving you a chance to keep important e-mail on your own computer. |
Once you are returned to the Accounts dialog box, press the
Close button.
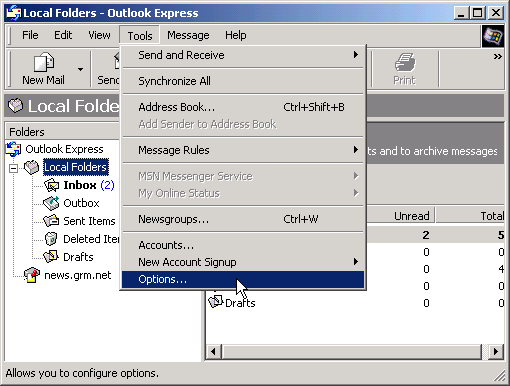
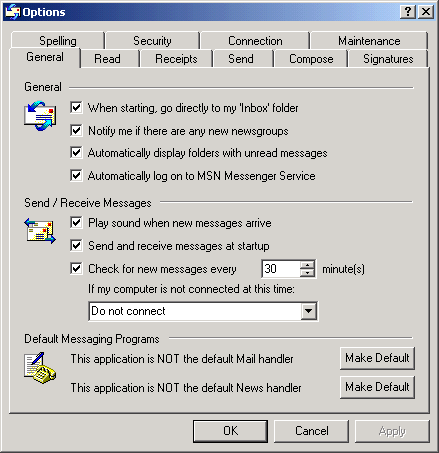
From the main Tools menu select Options... and
verify that Outlook Express does not check mail more frequently than 5 minutes.
If not then correct this and press the OK button.
The default setting of 30 minutes is fine
since you can check your mail any time you desire (see step 12).
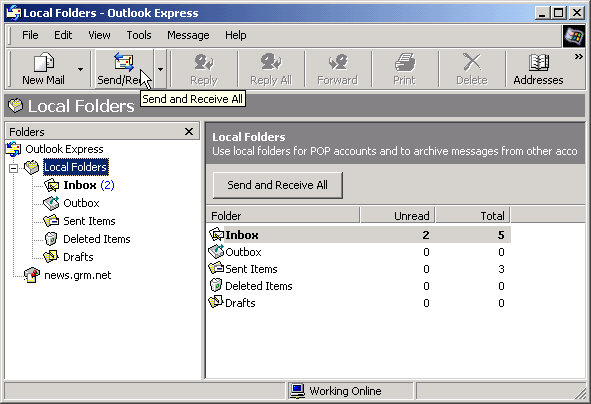
Now when you press the Send/Recv button you will
get mail from all of the accounts you have configured
(that is, those in which you checked the checkbox
for Include this account, as seen in step 9).
Any accounts that are not configured correctly will
result in errors (for that you may want
to uncheck the aforementioned checkbox until you
get the correct settings from someone who knows).
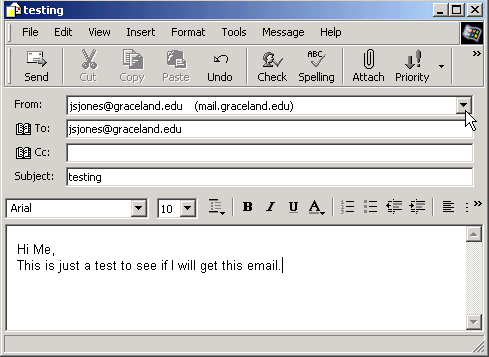
You should test out your e-mail setup by composing a new e-mail
test message and sending it to yourself.
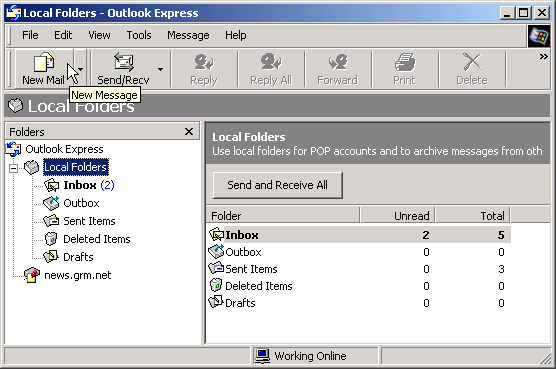
If you have multiple accounts, then you will see a From
field with a drop-down button to the right of it.
Make sure you are sending e-mail from your Graceland account.
If no From field is showing then you only have one
account configured for sending e-mail.