Outlook Express Settings for
Graceland University Students
Background Information
Student e-mail is handled on a different computer and in a
different manner than it is for faculty and staff at Graceland.
Student e-mail is handled by a "pop3" server running on brutus.graceland.edu.
The following instructions are for students at Graceland.
A tedious way to get at your e-mail is to run a telnet client program
to connect to brutus.graceland.edu and login to your
account on that machine. Once logged on, enter the pine
command to run a program that lets you access, compose, delete, or
send e-mail. When you do this, you are processing your e-mail directly
on the same server that handles it. For instance, when you delete
an old e-mail you delete it from the server (which
frees up disk space on the server).
An easier way to do this is to run an e-mail client program
on your own personal computer. To do so, you must configure it
to automatically transfer your e-mail from the server to your local
computer (usually deleting it from the server), and then provide
you with a Windows-friendly way to handle your e-mail that is
now stored on your local computer.
The following instructions show you how to do this for
Outlook Express. The particular version of Outlook Express
that you have may look slightly different, but the settings
will be similar.
Steps to Configure Outlook Express
Steps 1 and 2 occur if this is not your first time
to run Outlook Express, that is you already use it for
other e-mail accounts and want to add your Graceland account
to the mix. If not, then you will quickly find yourself at
step 3.
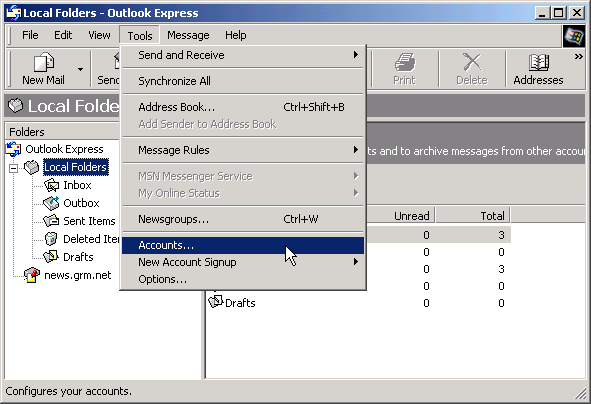
Step 1
From the Outlook Express Tools menu, select Accounts.
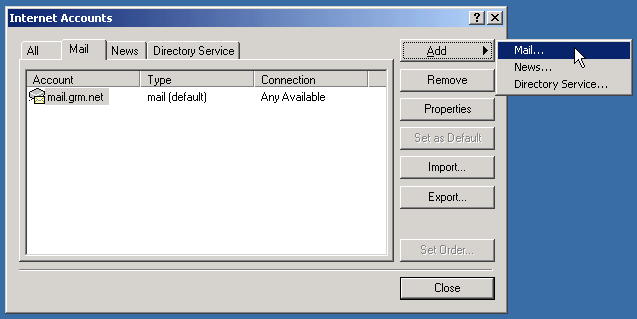
Step 2
Click on the Add button to add a new mail account.
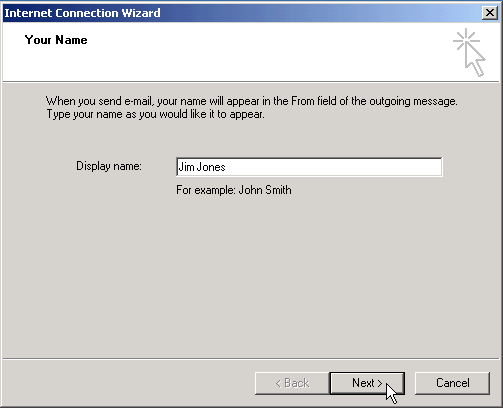
Step 3
Answer questions from the Wizard, starting
with your full name. Use your real name here,
otherwise responses to your questions or credit for homework
that you e-mail to faculty may not happen.
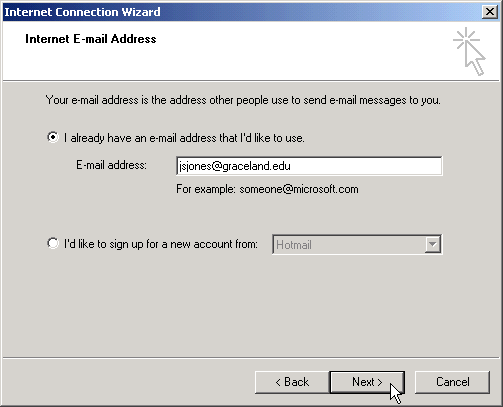
Step 4
Enter your complete Graceland e-mail address.
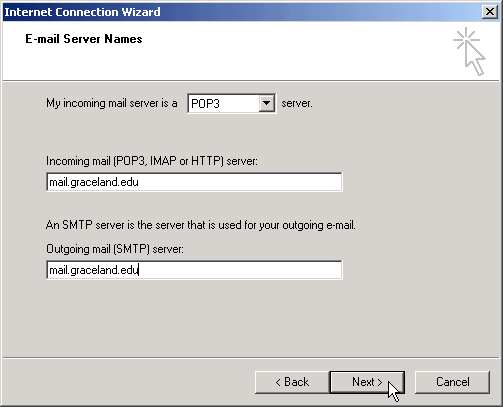
Step 5
Enter mail.graceland.edu as your incoming (POP3) and outgoing server.
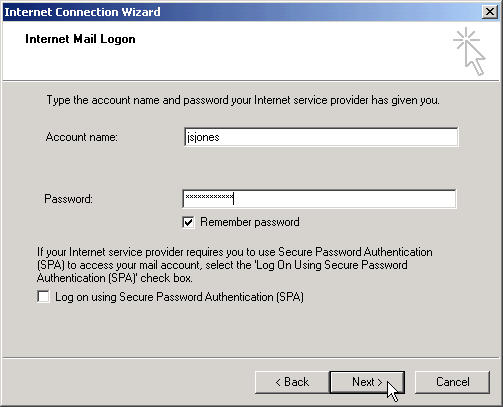
Step 6
Enter your account name (i.e., your Graceland account username).
If your PC is not secure from others using it, then you
probably should not enter a password and have it be remembered.
In that case, you will be asked for your password each time you
start Outlook Express.
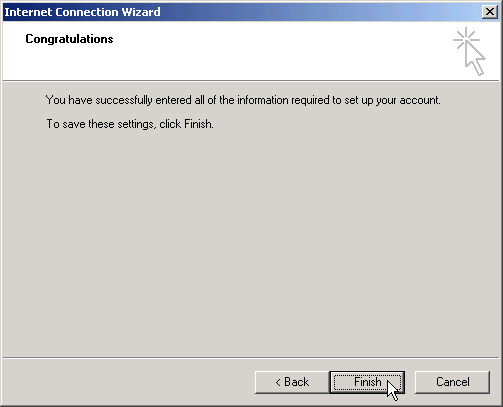
Step 7
Click on the Finish button if all is well.
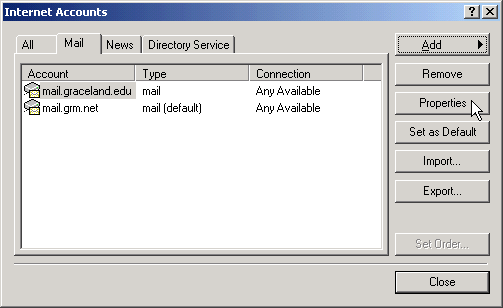
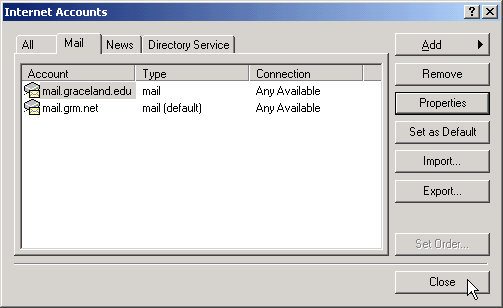
Step 8
You should be at the Accounts dialog box (from step 1) and see the added
Graceland account. If it is not highlighted, select it and
click on the Properties button to review the
configuration settings for this account.
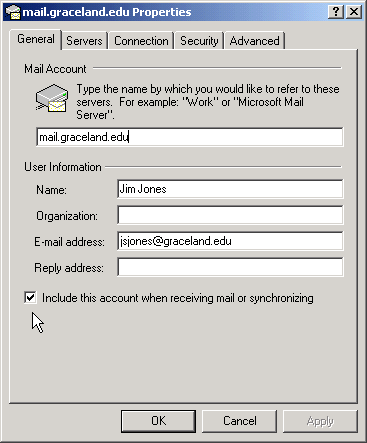
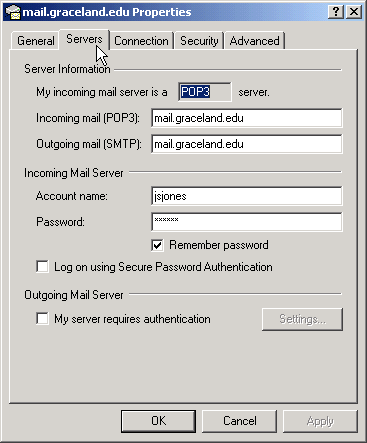
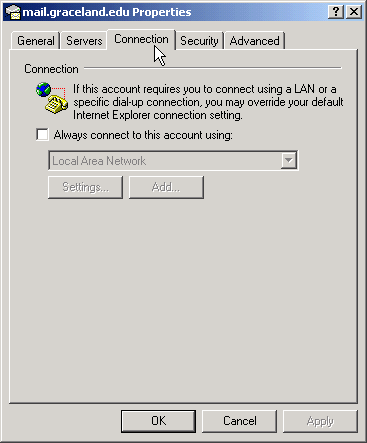
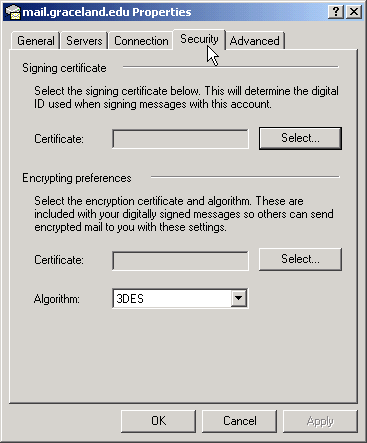
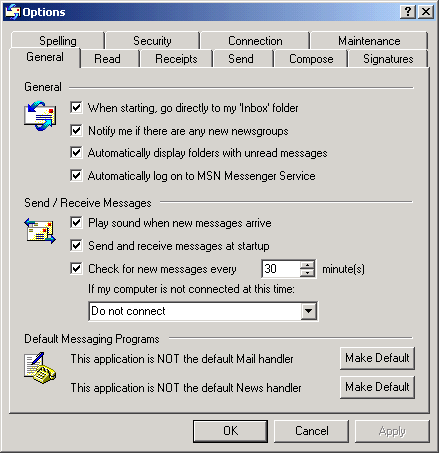
Step 9
Under each tab (General, Servers, Connection, Security, Advanced)
you have an opportunity to change configuration settings. If you
do, press the Apply button to save them. When finished
press the OK button. You probably do not need to do anything
if the data was entered into the Wizard correctly. Your settings
will look similar to those below. Make sure that the checkbox
to Include this account is checked under the General tab.
|
|
|
|
|
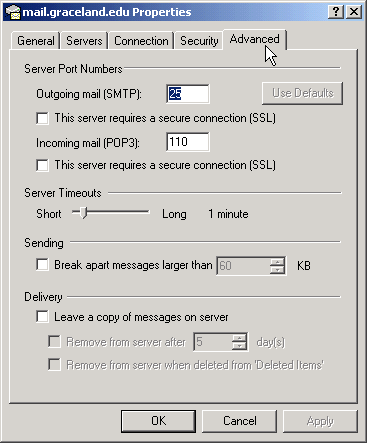
Notice that under the Advanced tab, the
Leave a copy of messages on server is not checked.
This is common. Many users are happy to have their e-mail
deleted from the server once it is transferred to their
local computer. It is also common for a user to check their
e-mail from several different computers (perhaps one
in your dorm room and another back home), in which case one
often checks this checkbox on all but one's own computer.
That way you can check mail from several computers but it will
remain on the Graceland server until you check up on your
e-mail from your own primary computer, thus giving you a
chance to keep important e-mail on your own computer.
|
Step 10
Once you are returned to the Accounts dialog box, press the
Close button.
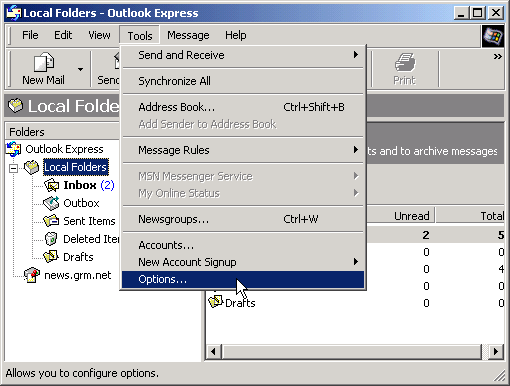
Step 11
From the main Tools menu select Options... and
verify that Outlook Express does not check mail more frequently than 5 minutes.
If not then correct this and press the OK button.
The default setting of 30 minutes is fine
since you can check your mail any time you desire (see step 12).
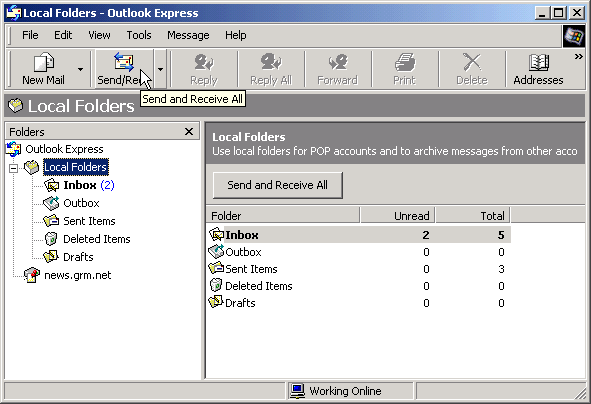
Step 12
Now when you press the Send/Recv button you will
get mail from all of the accounts you have configured
(that is, those in which you checked the checkbox
for Include this account, as seen in step 9).
Any accounts that are not configured correctly will
result in errors (for that you may want
to uncheck the aforementioned checkbox until you
get the correct settings from someone who knows).
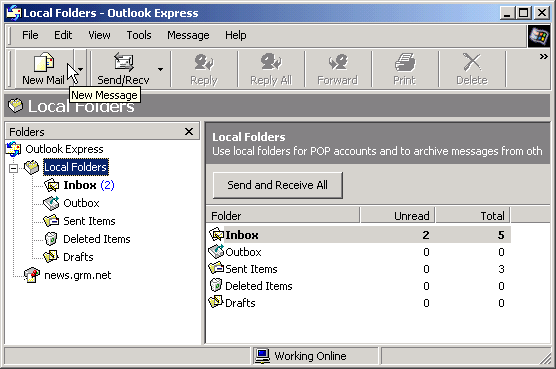
Step 13
You should test out your e-mail setup by composing a new e-mail
test message and sending it to yourself.
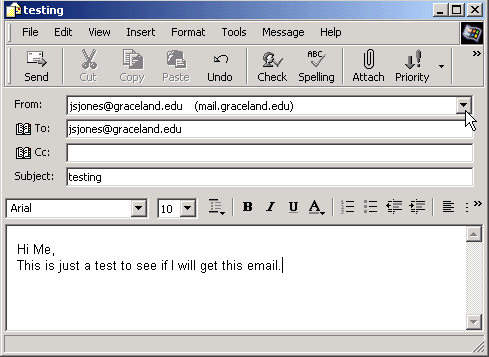
Step 14
If you have multiple accounts, then you will see a From
field with a drop-down button to the right of it.
Make sure you are sending e-mail from your Graceland account.
If no From field is showing then you only have one
account configured for sending e-mail.